
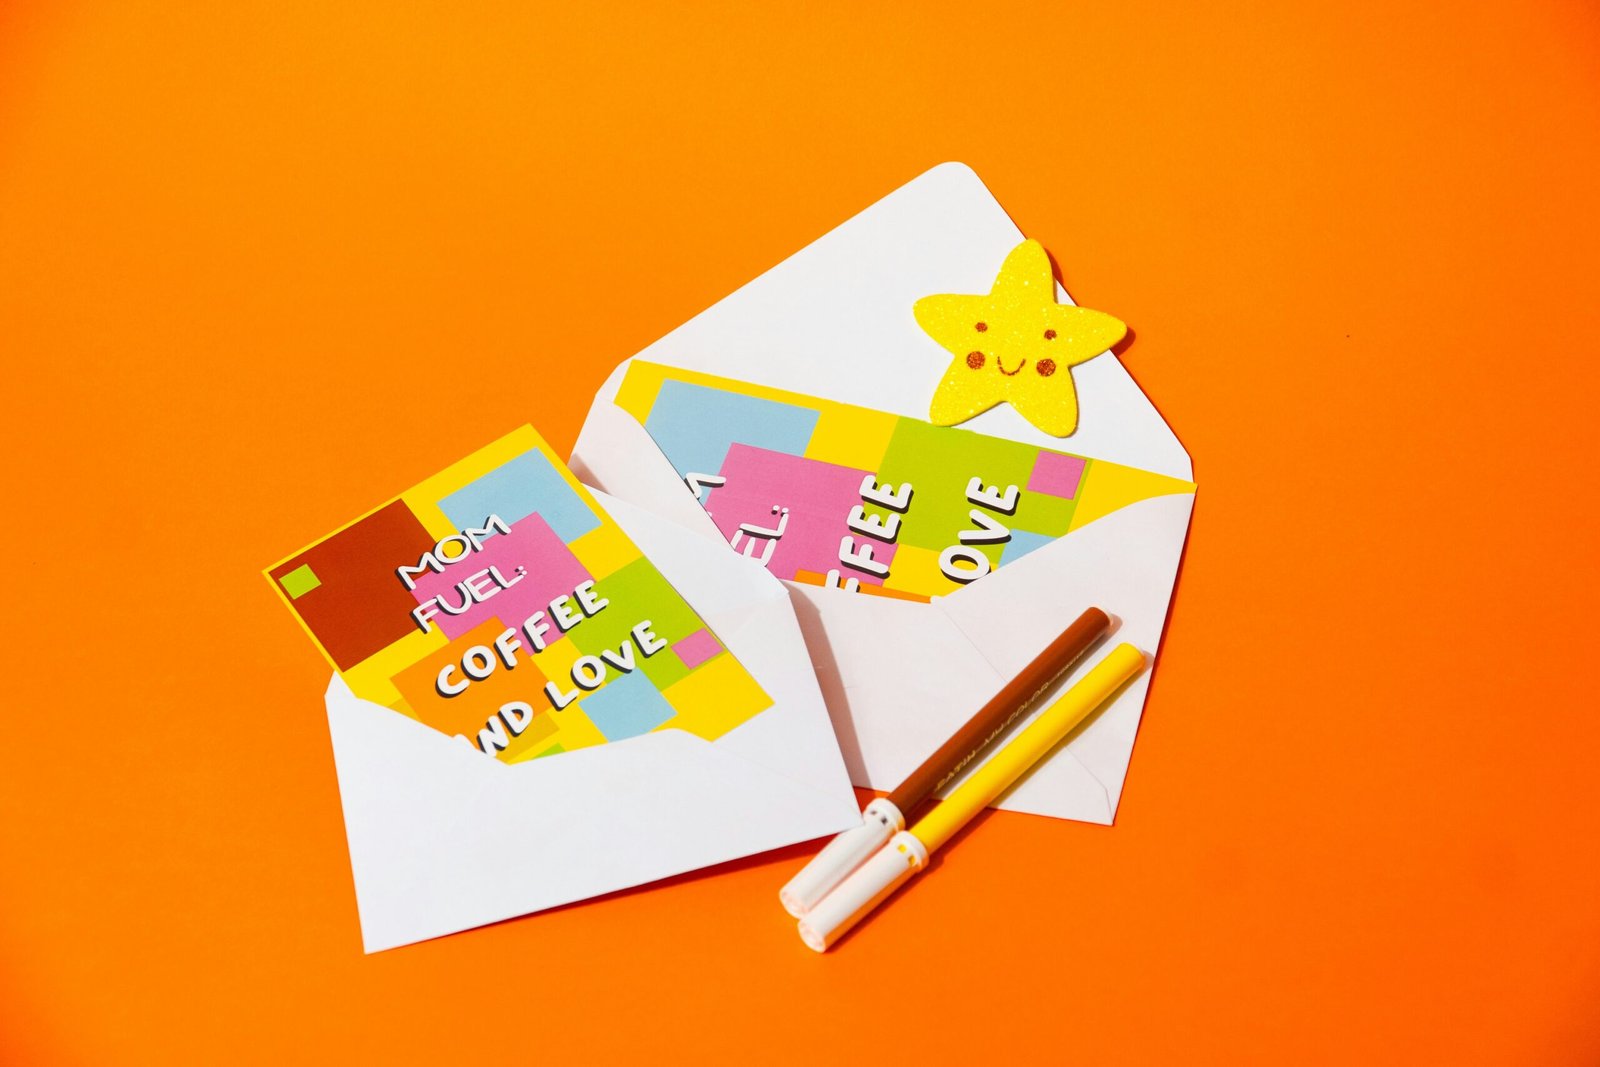
A paper envelope can easily be fashioned from a single sheet, an origami or paper-folding method that takes just a piece of paper, a flat surface and the space of a few minutes. If you need a quick holder for a small note, card, gift message, photo or small flat keepsake and you do not want to run to the store you can use this clever craft. This project is good for an activity for children, classrooms, handmade greeting cards, or creative gift wrapping.
Briefly put, one section of paper overlaps the next so that one corner forms one side of the pocket and the rest forms part of another side plus another corner provides the flap which closes. You may choose to not decorate your envelopes. You may draw or sticker your handmade envelopes. You may want to use decorative scrapbook or wrapping papers too.
Good folding, crisp folds and not ripping the paper make each envelope appear professionally made. Once you become familiar with the construction, the size and form is entirely variable.
What Makes a Paper Envelope Work?
When learning how to make an envelope out of a piece of paper, it helps to understand that a paper envelope is essentially a folded pocket with a flap that closes over its opening. Instead of a commercial envelope made by stamping a flat piece then folding it, a homemade envelope would essentially only be folded. Necessary sections include the flap pocket at the bottom, two side folds to meet in the middle at the back of the pocket and the top flap, all holding something in place or keeping it secure, the side folds keep the sides contained.
The most critical part would probably be giving the pocket the space required for the letter with room to breathe. The folds, both vertical and horizontal, would have to be flat enough to withstand being opened without being sharp and damaging the enclosed paper.
The easiest paper choices
Standard printer paper is a convenient starting point because it is easy to fold and widely available for basic paper crafts. Letter-size paper works particularly well for small notes and lightweight cards.
Other suitable options include:
- Construction paper for colorful craft projects
- Scrapbook paper for decorative envelopes
- Lightweight wrapping paper for gift messages
- Origami paper for small envelopes
- Recycled magazine pages for a creative look
- Plain colored paper for handwritten notes
Heavy weight card can also get tricky to fold well and could be fiddly with an small envelope. The Thinner you go (very thin paper might just tear at the creases).
How to Make an Envelope Out of a Piece of Paper
The basic idea is to use folding and no confusing cutting. The whole envelope can be fashioned from one sheet of rectangle (the shape would obviously vary depending on the object for which it is intended, inside).
If you are using an attractive piece of paper, laid on flat smooth surfaces, choose if the decorate part is to be outside.
Step 1: Position the paper
Lay your sheet of paper horizontally in front of you. Make sure that you smooth out the sheet with your hand so that there are no turned-up corners and the paper is flat.
If your decorative paper has an inside and outside design then place it so that the desired outside design face is down against whatever you are placing it on.
Step 2: Fold the bottom upward
Fold the bottom part of the paper upwards, making sure there’s enough space at the top for a closure flap; the space needed varies according to the size of the envelope- A wider flap creates a deep pocket; a smaller fold gives a shallow one- Press firmly down the crease, with your fingertip- A sharp crease simplifies all the next steps of building:
Step 3: Fold the sides inward
Fold the left and right edges toward the center.
These folds create the sides of the pocket. Try to make them symmetrical so the finished envelope does not look crooked.
When learning how to make an envelope out of a piece of paper, you do not necessarily need to measure every fold with a ruler. For a casual note, visual alignment is usually sufficient. If appearance matters, use a ruler to check that both side folds are approximately the same width.
Step 4: Shape the pocket
When the sides are folded in the bottom section will become the pocket.
This is a point when you should check what is to be done about closing it. Position the card or note you are to use next to it to see if the space it would fit into is adequate.
Do not overfill or the folds become strained.
Step 5: Create the top flap
Fold the remaining upper portion downward over the pocket.
This becomes the closing flap. Adjust the fold so the flap overlaps the front enough to stay closed.
For a more polished appearance, align the flap with the center of the envelope rather than allowing it to sit at an angle.
Step 6: Secure the envelope
The envelope does not require any adhesive if it sticks by itself when folded. Secure it by applying a small amount of glue or double sided tape along the sides and the bottom of the envelope that become a flap.
Do not put the glue into the pocket, so your content would be attached to the envelope as well.
You can seal the flap with sticker or paper seal after putting contents in.
How to Get Clean, Even Folds
Folds are of key importance to the presentation of your homemade envelope. Even an elementary fold can appear impressive with the proper folds, as long as your folds are neat and perpendicular.
To set the crease of a fold, use the edge of a ruler, a bone folder or even the backside of a clean spoon to crease the paper. Drag the tool lightly along the fold, rather than trying to smash it completely down flat.
If you are using an artful paper, then be precise in your folds. As a missed fold is often visible, even on a pattern.
Additionally, try to only create each fold once. Don’t simply fold the paper then smash down with the bone folder. Instead, ensure that each side of the paper has the proper distance and once you confirm you haven’t slipped, run your finger along the edge to set the fold.
Should you measure the folds?
Measurement is probably not necessary for casual craft projects. For an order of numerous identical envelopes, however, measuring can be helpful. Using a ruler can give you consistent dimensions for the side and flap of all your envelopes.
This can be quite useful for invitations, favors, weddings, craft projects for kids, etc.
Precision is what matters in these cases rather than one predetermined size.
Choosing the Right Size
The size of the paper determines the approximate size of the finished envelope. Before you begin, consider what you intend to put inside.
When learning how to make an envelope out of a piece of paper, the size and type of paper you choose can affect the final result. A small piece of origami paper can make an envelope for a short note or tiny decorative card. A full sheet of letter-size paper can create a larger holder suitable for a standard note or lightweight card.
For a thicker item, allow additional room in the pocket. Paper folds take up some of the available space, and an envelope that is exactly the same dimensions as its contents may be difficult to close.
A useful sizing trick
Lay the item on top of your paper before you press hard on the fold. Just guess roughly where your bottom pocket and side folds should be then make sure you have enough of a space left for your flap. A quick test like this can save you a lot of trouble as it is probably the one most people encounter – final folding, only to find the card wont fit.
Different Styles You Can Try
Once you understand the basic folding pattern, you can change the appearance without changing the overall concept.
Classic rectangular envelope
This is the most practical design. Straight side folds and a simple top flap give you a clean appearance that works for notes, cards, and everyday paper crafts.
Diagonal-flap envelope
Instead of making the flap completely rectangular, you can fold or trim the upper section into a pointed shape. This gives the envelope a more traditional stationery appearance.
If you cut the paper, use scissors carefully and plan the shape before removing material.
Decorative square envelope
Square paper can produce a compact envelope with a different visual balance. This style works particularly well with patterned scrapbook paper or origami sheets.
Mini envelopes
Small envelopes are useful for tiny notes, gift tags, craft projects, and paper decorations. Origami paper is especially convenient for this purpose because it is already cut into a manageable square.
Should You Use Glue or Tape?
Not all folded envelopes require adhesive. The purpose of some folded designs is to hold themselves shut, the flap resting within the pocket, or overlap between two portions of paper sufficient to keep them held in place.
Glue and tape will prove their use when you want an envelope to stay put.
The double-sided tape can be extremely handy as it leaves a hidden adhesion that looks very clean. Glue will do the same job however use small amounts and be careful, when using large amounts moisture can ruin delicate paper and crinkle it.
When crafting envelopes from durable paper you might also wish to glue up the edges. Before inserting an item you must let the adhesive dry totally.
When it comes time to mail it, relying on a simply folded enclosure probably isn’t the best method for a handmade envelope and a handmade envelope still should be appropriately sealed according to postal mailing requirements depending on the delivery method used.
Common Mistakes to Avoid
A few small errors can make the finished envelope uneven, weak, or difficult to use.
Making the pocket too small
The most obvious problem is insufficient interior space. If the item barely fits, the paper may bulge or the flap may not close properly.
Leave a little clearance around the contents.
Uneven side folds
If one side is folded much farther inward than the other, the pocket will be off-center. The flap may also fail to line up with the envelope.
Take a moment to compare both sides before reinforcing the creases.
Using too much adhesive
More glue does not necessarily make a better envelope. Excess adhesive can seep through the paper, create lumps, or stick the contents to the inside.
Apply a narrow, controlled amount along the seams.
Folding against a wrinkled sheet
Wrinkles make accurate folding difficult and can leave the finished envelope looking untidy. Start with a flat sheet whenever possible.
Using paper that is too thick
Heavy cardstock may resist multiple folds. You can still use it for certain designs, but a simpler folding pattern may be necessary.
For a first attempt, ordinary paper is easier to manipulate.
How to Make It Look More Professional
A homemade envelope does not have to look homemade in the unfinished sense when following creative paper crafts techniques. A few design choices can give it a cleaner appearance.
Choose paper that complements the card or note inside. A subtle pattern can make the envelope decorative without additional embellishment.
You can also add:
- A handwritten name
- A small paper seal
- Washi tape
- Simple line drawings
- Rubber-stamped designs
- Stickers
- A contrasting flap
- A small ribbon detail
Avoid adding bulky decorations if the envelope needs to fit inside another envelope or be mailed. Raised embellishments can catch on equipment or make the package unnecessarily thick.
For gifts, matching the envelope paper to the wrapping paper can create a coordinated presentation.
How to Make One Without Glue
This paper envelope will also work, if you have no adhesive to hand! The trick here is using overlapping folds to seal themselves and keep themselves secure. The side and bottom sections can be folded in on themselves to form a pocket and the top flap is then tucked into the pocket entrance.
These types of envelopes are good for temporary storage and for short written messages.
It may, though, open very easily and not be a strong seal like tape or glue would be – fine for very light and not overly important objects!
Can You Make an Envelope From Scrap Paper?
Definitely. Scrap paper is good for this, as long as it is of sufficient size and still in decent condition.
Pages from old calendars, unprinted parts of gift wrap, magazine sheets, used paper grocery bags and other left-over craft papers could all offer interesting patterns.
When using recycled paper, check to see that one or both sides are free of any unwanted pictures or writing. Be certain the paper isn’t too dry or brittle, though, old paper might crack where it folds or folds creases were not there before.
By recycling paper, you have given discarded paper new life in a useful new stationer, or as a small, new craft project.
Special Considerations for Mailing
This will be the same, whether the envelope is just for personal craftsmanship, or if it is being sent through the postal system, although if you are sending it through the system the envelope should be quite sturdy and definitely fastened well. If you are making a craft, and do not intend to send it through the postal system the envelope could be a wider size or shape in which case you could add on any appropriate decoration in the center portion.
Anything with too much bulk for the envelope needs to be attached to the inside rather than the outside if you want the envelope to pass through the mailing process with minimal difficulty and risk of damage.
When learning how to make an envelope out of a piece of paper, you should also check the current requirements of the postal service you intend to use. Size, shape, thickness, closure, and addressing requirements can affect whether a handmade envelope is suitable for mailing.
For valuable or delicate contents, a sturdier commercial envelope or protective mailer may be more appropriate.
Creative Uses for Homemade Paper Envelopes
The value of this craft goes beyond sending letters. Handmade envelopes can become useful organizers and decorative elements.
You can use them to store:
- Small photographs
- Receipts
- Gift cards
- Handwritten notes
- Stickers
- Paper cutouts
- Seeds for a craft or gardening project
- Small flat keepsakes
They also work well for party games, classroom activities, scrapbooking, journaling, and handmade stationery sets.
For children, envelope-making can introduce basic concepts such as symmetry, sequencing, measurement, and spatial awareness. Younger children may need help with precise folds or scissors, depending on the project.
A Simple Way to Practice
Once you have one or two good envelopes, you can then play with. Even if your first one is not perfect-do not feel as if you are wasting decorated paper. Try one, using simple printer paper first.
Observe how the fold is automatically placed when you crease across your envelope and get a rough feel of where you need space for pocket, sides and flap.
Then you can repeat the process using better paper. You can also deliberately make two or three with an altered shape-try a deeper pocket or a wider flap, or smaller side creases. Once you have tried it a couple of ways, the method will just feel far more intuitive than it is remembering specific measurements.
Final Tips for a Better Result
A few habits make the process easier:
- Start with a flat, undamaged sheet.
- Choose paper appropriate for the size and purpose.
- Check the contents against the paper before committing to folds.
- Keep the side folds as even as possible.
- Make firm but controlled creases.
- Use adhesive sparingly when needed.
- Test the finished pocket before decorating it.
- Avoid bulky decorations if the envelope will be mailed.
The goal is not to create a technically perfect geometric object. A useful envelope simply needs to hold its contents securely, close neatly, and suit its intended purpose.
Conclusion
Learning how to make an envelope out of a piece of paper gives you a quick way to create useful stationery without buying a ready-made envelope. It’s so easy to make an envelope and closure with one simple folded flat sheet. Whether your creating a tiny envelope for a tiny note or using it for to send or to receive a gift card or as a craft. Use any size paper, designs, and any occasion.
Practice with an everyday flat sheet of paper, then start experimenting with different patterns of scrapbook paper, different sized pieces or with designs on sheets of paper.
Just make sure it’s precisely aligned and you leave space in the middle of each piece and you have crisp folds, with or without the glue/tape.
FAQs: How to Make an Envelope Out of a Piece of Paper
1. Can I make an envelope from a regular sheet of paper?
Yes. A standard sheet of paper can be folded into a simple envelope without special equipment. Letter-size, A4, construction paper, or decorative paper can all work, depending on the size and strength you need.
2. What size paper do I need to make an envelope?
A square sheet is often easiest for a basic folded envelope, but rectangular paper can also be used. Larger paper generally produces a larger finished envelope.
3. Do I need glue to make a paper envelope?
Not always. Some folding methods create an envelope that stays closed through overlapping flaps. For a more secure envelope, you can use a small amount of glue or double-sided tape on the side and bottom flaps.
4. Can I make an envelope without scissors?
Yes. Many simple envelope designs require only a piece of paper and careful folding. If you want to trim the paper to a specific size or shape, scissors can make the process easier, but they are not essential for every method.
5. What type of paper works best for a homemade envelope?
Medium-weight paper is usually a good choice because it folds easily while still holding its shape. Decorative scrapbook paper can make attractive envelopes, while ordinary printer paper is convenient for quick or casual projects.
6. How do I keep a homemade paper envelope closed?
You can tuck the top flap into the envelope, use a small piece of tape, or apply glue or double-sided adhesive to the appropriate flaps. For gifts or crafts, stickers and decorative seals can also work well.
7. Can I use a homemade paper envelope for a card?
Yes. A folded paper envelope is useful for handmade cards, notes, invitations, small photos, and lightweight stationery. Check that the finished envelope is large enough for the item before sealing it.
8. Can children make an envelope out of paper?
Yes, simple folding methods can be a fun paper craft for children. Younger children may need help with precise folds, while scissors or adhesive should be supervised when necessary.